The Rhopoint Optimap has established a reputation within the automotive industry of providing the most reliable and representative measurement.
For maximum consumer impact, high quality products require high quality finishes that are homogeneous, blemish and defect free. Surface finish is currently assessed subjectively by visual inspection or measured by instruments that do not capture a full picture of surface quality.
The Optimap™ is the first portable instrument to map and measure surface texture
Using an advanced measuring technique known as Phase Stepped Deflectometry (PSD) the Optimap™ is capable of making fast, objective, full field measurements over large areas requiring no movement over the surface.
How does it work?
- The Optimap 2 can be battery or mains operated and is suitable for use in the laboratory or on the factory floor. It is operated by an intuitive touch screen operation and has a built in file system that allows measurements to be stored in an organized structure.
- The Optimap 2 can measure most surfaces from ultra matt to mirror finish.
- When a measurement is initiated, an internal target screen displays a series of optical fringes. These fringes are reflected in the sample surface and captured by a camera. The typical acquisition time is < 3 seconds.
- Using a technique called PHASE stepped deflectometry the instrument builds a 3D map of the sample surface. The typical calculation time is < 5 seconds.
- The scale of the map is (curvatures m-1). The curvature map represents an exaggerated view of how the eye sees surface quality and defects
-
The results can be filtered to simulate different viewing distances from:
Ta: High frequency texture which is visible from less than 1m up to Te: Waviness visible from 3m away from the surface. - Results can be shown as texture which is compatible with other waviness measuring instruments or curvatures, a traceable measurement m-1
- The maps can be zoomed in and panned to view defects in high resolution. Stored results can be output to software for further analysis.
Features
- Rugged and accurate the Optimap™ 2 is suitable for laboratory, factory or on-site inspection.
- The soft touch measurement portal means the instrument can be used safely on the highest quality surfaces.
- No movement required during measurement
- Surface texture and defects can be assessed on a huge variety of surfaces: semi matt surfaces to polished mirrors, small & curved parts
- A large area is mapped in a single operation (79mm x 57mm), up to 100 times more representative than other texture scan instruments
-
A variety of different shaped regions can be created actively on the screen image allowing areas inside or outside the region to be included or excluded.
This advanced functionality is useful for surfaces with complex shapes where areas fall outside the instruments field of view of measurement.
Once a region has been created and confirmed, measurement results
adjust to the new image dimensions. Regions can be resized and moved
to allow selection of a region of interest or deleted completely restoring
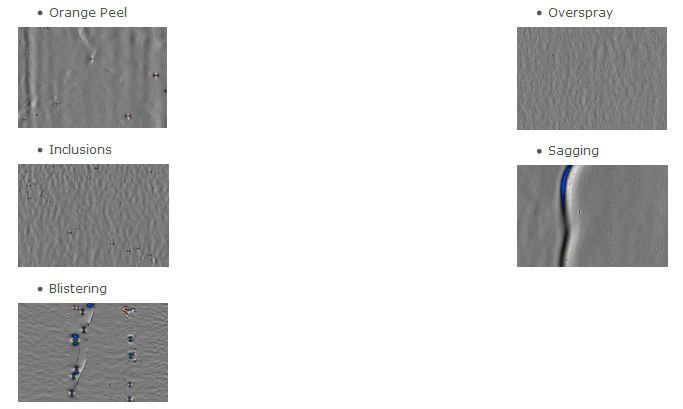
the original image. - Onscreen texture maps show orange peel, waviness and surface defects in incredible detail
- Objective measurements can be displayed in traceable SI units or selected industrial scales
- Data and results are fully compatible with other analytical techniques and third party software
- Optional software allows sophisticated texture/fault analysis and report generation
Read more about Optimap 2 measurement theory here…
Ondulo Reader Software
Rhopoint Ondulo reader software features advanced data analysis and reporting.
- Surface effects such as texture, flatness, number, size and shape of local defects can be identified, mapped and quantified
Curvature Profile

| Range | Wave Length (mm) | Curvature (m-1) |
|---|---|---|
| K | 0.1 - 30.3 | 2.246 |
| Ka | 0.1 - 0.3 | 1.526 |
| Kb | 0.3 - 1.0 | 1.217 |
| Kc | 1.0 - 3.0 | 0.390 |
| Kd | 3.0 - 10.0 | 0.446 |
| Ke | 10.0 - 30.0 | 0.199 |
Profiles of curvature, slope or altitude can be characterised

Example of defect analysis in Ondulo
3D View

Cross Section across Y-Y

Cross Section across X-X

Drag and drop feature allows images and data to be easily transferred to Microsoft Word for reporting.
- Flexible screen view feature allsows the display of result maps in single, dual or 3D format
- 3D view allows full rotation of surface and X / Y cross sectional views
- Dual view allows comparison of saved result maps
- Scaling dimensioned in either curvature (m-1) µm
| Range | Wave Length (mm) | Curvature (m-1) |
|---|---|---|
| K | 0.1 - 30.3 | 2.246 |
| Ka | 0.1 - 0.3 | 1.526 |
| Kb | 0.3 - 1.0 | 1.217 |
| Kc | 1.0 - 3.0 | 0.390 |
| Kd | 3.0 - 10.0 | 0.446 |
| Ke | 10.0 - 30.0 | 0.199 |
- Display: 6.5 inch Colour VGA TFT Touch Screen
- Camera: 1.3 Megapixels, image resolution 1296 x 966
- Measurement Area: 79mm x 57mm
- Lateral Resolution: 75µm
- Data storage: 6GB Compact Flash – 200 readings
- Power: Lithium Ion Battery 4800mAH / 4-8 hour usage / charge
- Weight: 3.0 Kg
- Dimensions: H – 200mm, W – 218mm, D – 250mm
- Better than 1%
- Reproducibility: Better than 2%


